There’s not a whole lot on the internet about Makhbouz, and what I do know about them is what I have heard from my family. Growing up in California, any visit to NY to see my grandparents was punctuated with a big bag of frozen makhbouz to take home. My grandmother made these treats by the dozens and they never lasted on a plate for long. According to her, it’s an Iraqi Jewish pastry but it might just be a Sephardic dish which was originally served at Purim. It can be filled with jam (typically apricot), dates, or my personal favorite: cheese.

Makhbouz – Iraqi Jewish Pastry filled with Cheese
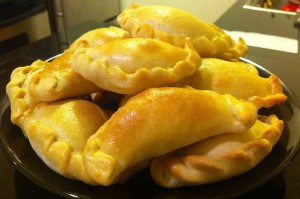
Since those days, I’ve moved to NYC and spent a lot more time with my now older grandparents. I’ve always wanted to learn how to make makhbouz and after seeing how poorly documented it is, I decided to take it upon myself to give it a go. (Note: there are many other similar dishes to makhbouz like sambusek or pierogy) After a couple of failed attempts, I went to visit my grandmother, iPad in tow, and documented her instructions word-for-word. It paid off. They came out delicious and I now am the proud owner of a little mountain of makhbouz.
Makhbouz – Iraqi Jewish Pastry filled with Cheese
- 2.5 cups all-purpose flour
- 0.5 cup of warm water
- 4 tablespoons melted butter
- 3 eggs
- 1 tablespoon baking powder
- 2 teaspoon salt
- 1 teaspoon sugar
- ¼ pound of feta, grated (pick your favorite feta... I like Bulgarian)
- ¼ pound of a salty, medium-hard cheese (I used sharp cheddar), grated
- 1 tablespoon minced dill (optional)
- 1 tablespoon minced scallions (optional)
- Make the dough by combining the butter, baking powder, flour, sugar, 1 teaspoon of salt and 1 egg.
- Add the water bit by bit while mixing until it forms a nice ball that's not too sticky (you should not have residue stuck to your hands if mixing by hand).
- Let the dough sit for 30-45 minutes on the counter (cover it with something so it doesn't dry out). While it's sitting you can start the filling.
- To make the filling, combine the cheeses, 1 egg, 1 teaspoon salt, and herbs then 'mush' with a fork (sorry, I couldn't think of a better word than mush!) until it's all mixed and not too lumpy.
- Once your dough is done sitting, roll it out on a floured surface until it's about ⅛ of an inch thick. If you're like me and don't have a rolling pin, cover a soda bottle with plastic wrap and get to rollin'.
- Once you're all rolled out (your triceps should be a bit tired), grab a 3" inch round cookie cutter, or if you're like me and don't have a cookie cutter, use the top of a glass cup (hey, it's NYC, kitchen space is limited!) to stamp out the dough.
- This is when you'll want to crack that last egg for the wash and beat it 10-15 times and have it on hand for filling.
- Grab your first dough circle, paint half of the edge with the egg wash (like a half circle), then dollop about a teaspoon of filling in the center. This is where it gets a bit laborious so listen up.
- Pinch the edge of your makhbouz all the way around so that the pinched part is stretched out and thinner than the rest. Then, swipe one side of the pinched edge with some more egg wash - this is important as it will help adhere it.
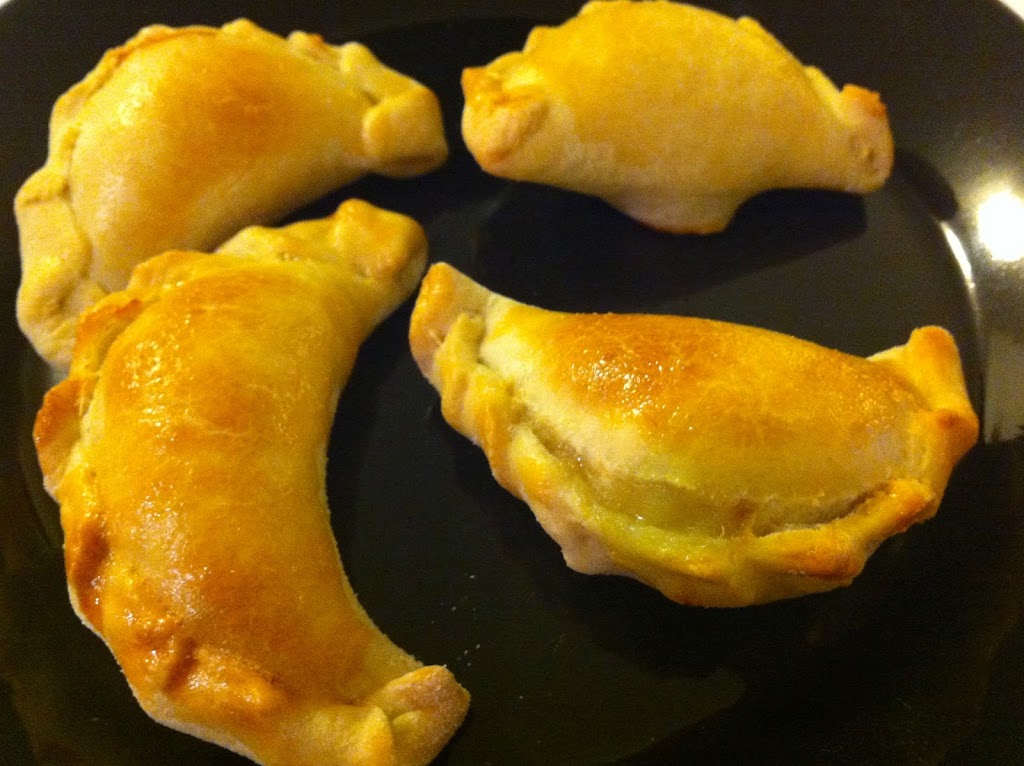
- Then, go around the makhbouz and roll a little bit of the pinched edge over at a time, so that it gets a scalloped look to it. Not only does it look cute, it serves to keep all that delicious filling in while baking! When you're all done (I think this recipe produced about 24 makhbouz), you should have a nice set of empenada-looking things ready to bake!
- Brush each makhbouz with more egg wash to give it a shiny coat and that nice golden brown color, and pop them into an oven that's been preheated to 375 degrees.
- Bake for 20-25 minutes (remove as soon as they are golden brown), then ENJOY!! Note: they can be frozen and reheated, but they taste best fresh.

These makhbouz look and taste delicious! That is one mountain I want to conquer–all by myself!!
Wow! So proud of you, Ahu! Very time consuming, but so well worth it. Yum…
These look delightful! The golden color of the crust is great, and the cheese and dill filling sounds fantastic.
I’ve been chasing the flavour of my grandmother’s samboosek (I think that is the proper name of these cheese cookies) and this recipe was almost perfect. All I added was some Greek yoghurt which not only added to the flavour ethe dough but it also made it much easier to handle when filling. I also used an empanada press to make the filling process a little easier.